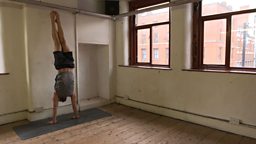
The Handstand Challenge - #MakeYourMove
See the world from a different angle, like you did when you were a kid.
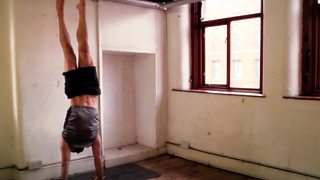
Here’s a challenge that will not only improve your balance but will get your core muscles working too. Before you know it you’ll be upside down, off the wall and showing off your new party trick to anyone who’ll watch.
Handstands are all about keeping yourself steady by using strength in your arms, abdominals and lower back.
To build up these areas, you’ll start with a routine that doesn’t involve putting your feet in the air - but trust us. Doing these stretches daily will make it far easier when you do decide to join the upside down club.
Make sure you follow the steps every day to build the strength you need to hold the handstand.
Don't forget that it's International Handstand Day on Saturday, 25 June 2016. Post your efforts on social media using #HandstandDay and show the world your skill!
The challenge in a nutshell
| Your | Why |
|---|---|
| Aim | Hold a handstand without support from a wall for at least 3 seconds. |
| Benefits | Not only will you strengthen the muscles in your arms, core and lower back but you will also be making your bones stronger. Plus, being upside down can help circulation to your upper body. And it’s just good fun. |
| Goal | Lots of people feel nervous putting their feet above their head, but this challenge is like a jigsaw. After a few weeks of doing steps one to three, putting everything together should make you feel totally in control when you do attempt your first handstand. Be sensible about how quickly you move on from step to step – being patient with yourself may feel boring but it will keep you healthy and free of injury. |
| Next steps | See if you can increase the time you hold your handstand, or get into one without the support of a wall to get you started. |
Your daily routine
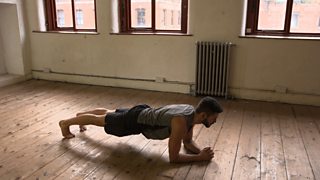
Warm Up with The Plank
- On your hands and knees, place your elbows on the ground directly under your shoulders and clasp your hands.
- Lift your knees off the ground so your legs are off the ground and fully extended, you should be on your toes.
- Pull your stomach muscles towards your spine to engage your core strength
- Hold this position for 10 seconds, building to 30 seconds.
The Plank develops muscles in your shoulders and upper arms to support you from the bottom up. You should do this daily. It also uses all of the muscles you will need to complete a handstand so it's a great way to wake up body.
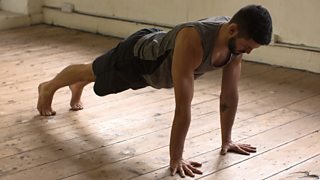
Step 1 – The Straight Arm Plank
- On your hands and knees, spread your fingers and put your hands on the floor directly under your shoulders with your arms straight.
- Lift your knees off the floor and move onto your toes.
- Pull your stomach muscles in towards your spine to keep your core strong and your back flat
- Hold the straight arm plank for 10 seconds, building to 30 seconds.
This challenges your shoulder and arm muscles even more, building strength in your lower arms and providing more of a challenge to your abs. Do this daily.
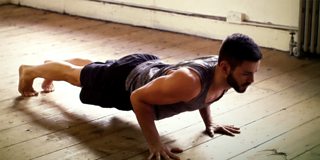
Step 2 – The Press Up
- On your hands and knees, spread your fingers and place your hands under your shoulders
- Lift yourself into the straight arm plank position
- Pull your stomach muscles towards your spine to keep a strong core
- Lower your whole body towards the ground by bending at the elbows
- Push yourself away from the ground by straightening your arms
- Repeat the up-down movement 10 times, making sure to make the movement controlled and not too fast.
This develops the strength in your upper and lower arms as well as across your shoulders. While you are building strength, you could keep your knees on the ground if a full press up feels too daunting. Build up to doing a full press up. Do this daily.
Step 3 - Gaining Strength
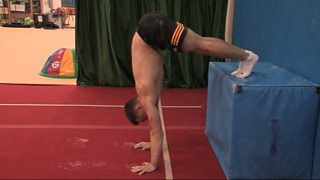
Watch the video for a quick tutorial by Olympic gymnast, Max Whitlock.
- With your body facing down, put your feet up on a stable chair or sofa
- Keep your hands on the floor
- Your body should be straight to start with
- Walk your hands closer to the chair keeping your legs straight
- Your hips will lift higher the closer your hands get to the chair, meaning that you are more upside down
This is good for your spatial awareness as well as good for gaining strength in your arms. Doing this step often will get you prepared for carrying your body weight on your hands, and also give you the confidence of being upside down.
Step 4 – Feeling the Flip
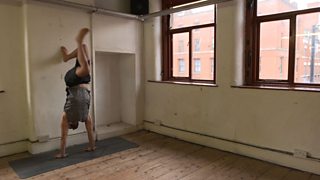
- To get used to the idea of doing a handstand you should practice kicking your feet up over your head against a wall
- Put your hands on the ground shoulder distance apart then move them slightly so they are a little diagonal. This helps to support your weight and eases stress on the shoulders.
- Now kick your legs up and over towards the wall
- You are aiming to feel the wall with your feet and get used to the sensation of being upside down and carrying your weight on your hands
Do this each day until you feel steady enough to move onto Step 4. Some people will take longer than others. Keep building your strength and getting yourself familiar with the move.

Step 5 - Handstand against a Wall
- Spread your hands and place them on the floor about 10cm away from the wall with your fingers pointing towards it, then move your hands slightly diagonally (as with Step 3)
- Kick your legs up over your head towards the wall
- With your knees bent, anchor your feet on the wall to get your balance
- Walk your feet up the wall to straighten your legs
You’ve done it – you are handstanding against wall. Good job. Keep practising this move daily until you are feeling strong in your stance.

Step 6 – Handstand off of the Wall
- Do what you have been doing, kicking your legs up over your head and against the wall.
- Walk your feet up the wall to straighten your legs.
- Point your toes and remove one foot from the wall.
- When you are ready, take your other foot off the wall and support yourself from the ground upwards.
- Lower yourself down gently, making the move controlled.
Don’t push yourself too soon. Practice taking one foot off the wall a few days before attempting to take them both off the wall. When you feel strong enough, take both feet off. Build up to 3 seconds of standing before lowering yourself down.
Don’t forget
- Track your results - motivation looks different for everyone, but nothing helps you to see progress like looking back at how much you have achieved. If you find holding the plank for 30 seconds is easy, then increase the time by ten seconds each week. The same goes for the press ups, increase the number you do as your strength improves.
- If you would like to keep a manual diary, print and keep notes.
- Show us how you are getting on. Use #MakeYourMove on , or to join the conversation and see who else is putting their feet in the air like they just don’t care.
Need more convincing?
If you are the kind of person that needs to be great at something right away, this might not be the challenge for you. If you want to test your mind and body, read on.
The art of performing a handstand the right way is a long process that requires patience and time. The control that it takes to hold your body up will exercise most of the muscles in your body as well as focus the mind. By investing a little time each day to doing the strengthening steps and practising the move against the wall, you will surprise yourself.
If you put a bit of time aside for yourself, you will achieve things you never thought you could.
